


Today I am going to share my experiences on setting up a honeypot in Azure and analysing it.
Overview
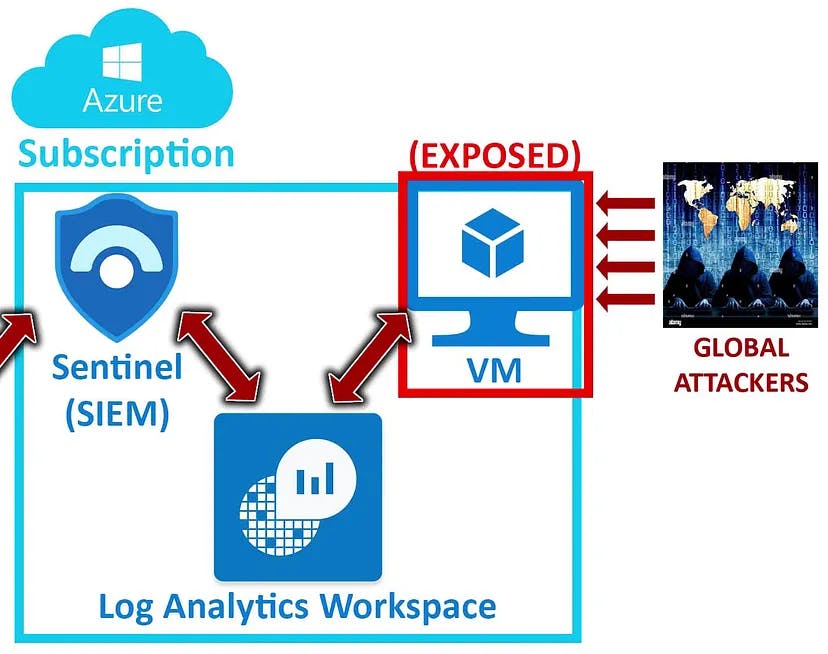
We will be setting up an extremely vulnerable VM which will be our honeypot (a device, set up to catch hackers). Then using a powershell script, we will export all the failed RDP logs from Event Viewer and then will send them through an API which will parse the data of latitude and longitude of IP address in the logs. Then we will import them into Azure Sentinal, where we will try to plot the geographic info of the users who tried to log in to our honeypot.
For this, I will be using my Azure Student Credit, which I got from the Github Student Developer Pack.
So lets start the setup:
Creating VM
First, we will setup our honeypot VM on which the hackers will attack.
Head on to portal.azure.com and sign in with your account.
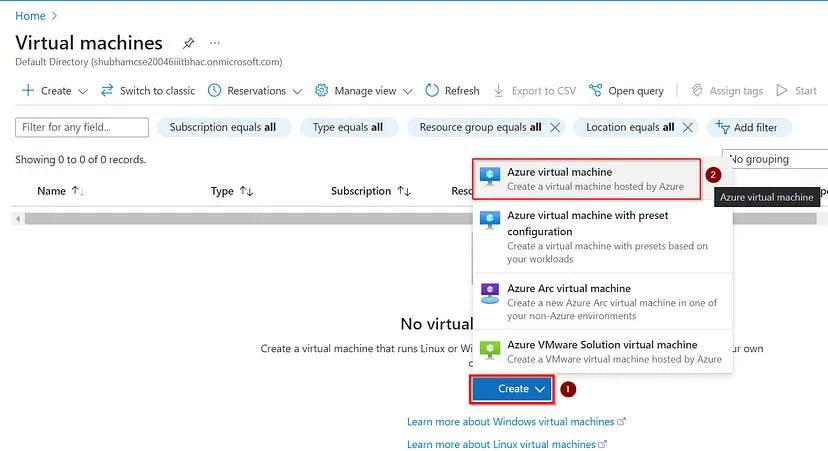
In the dashboard, head on to the hamburger menu on the left, and click on Virtual Machines.

Click on “Create” and select “Azure Virtual Machine”:
Fill all the details required to setup the VM:
- First, we will create a new Resource Group, (which will consist all the resources of this project).
Click on “create” and name as per your choice.
(I named it as HoneypotLab for lab)

Provide a name to the VM.

Here, one can also choose to use Windows 10 i_nstead of_ Windows 11.
Scroll down to configure user account .

Remember the user account details, as we will use it during the RDP session.
Confirm the hosting rights and click Next.

Leave everything as it is and click “Next”.
Now, we will configure the Networking section of our honeypot-vm.
Select “Advanced” in Network Security Group option.
We will create our own NSG.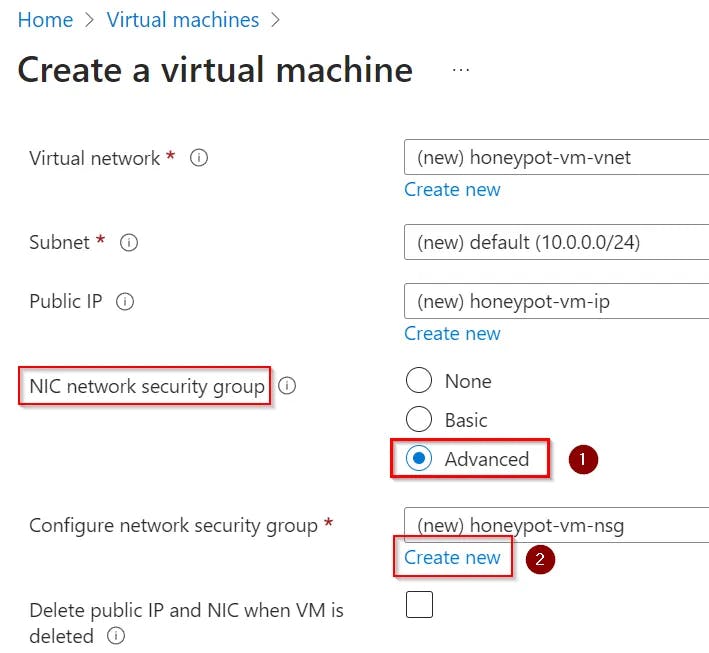
Delete the pre-defined rules.

Add inbound rules:

We will put ‘*’ in Destination Port ranges in order to allow every inbound connections from any ports.
(This will make our VM extremely Vulnerable).Also, set the priority to least and then click on “Add”.

Click OK.

Make sure to check these two options, (as these will ensure that we need not to delete these resorces manually in future).

Click on Review and Create button.
Once verified, click on to “Create”.

It will start the deployment process.
Log Analytics Workspace setup
Next, we will setup log analytics workspace, in which, we will ingest logs from the VM and then will analyse those failed RDP logs.
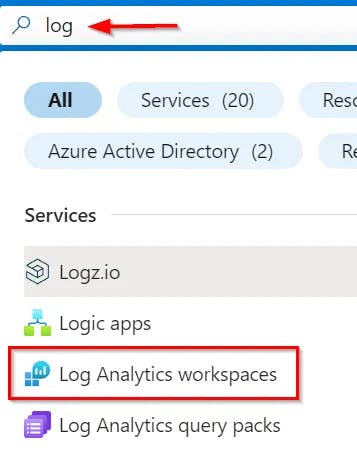
Head on to the “search bar”, and search for “log”. Click on “Log Analysis Workspace”.
Click on “Create Log Analytics Workspace” :

Select the resorce group which we created earlier.
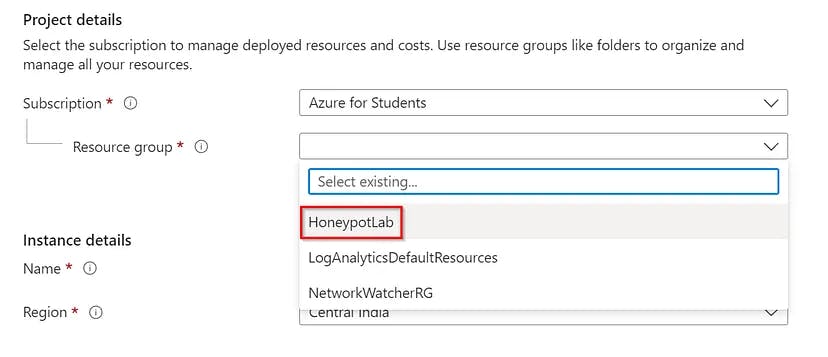
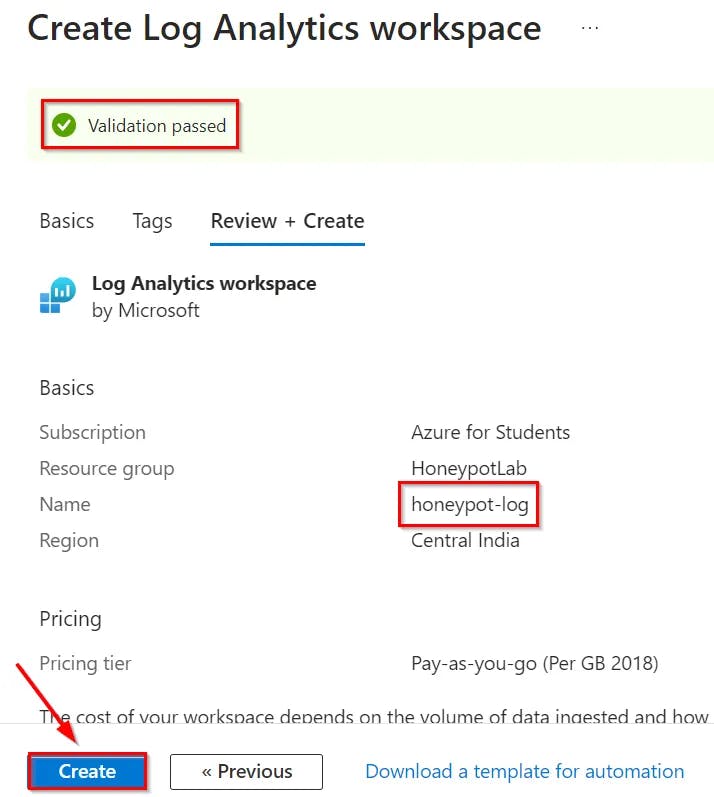
Add name and region for the Workspace.
Click on “Review and Create”.
Setting up Microsoft Defender for Cloud
Now, we need to enable the ability to gather the logs from the VM. For that:
Head on to the search bar and search “defender”.
Click on “Microsoft Defender for Cloud”.
On the left hand side, select “Environment settings”
Scroll down to see our “log analytics workspace”. Click on it.
Turn on defender for “Servers” and Save.
Head on to “Data Collection” and select “All Events” and Save.
Connecting VM to Log Analytics Workspace
This will help us in analysing the logs generated during connecting via RDP to the VM.
Head on to Log Analytics Workspace and select the workspace which we created earlier.
Select “Virtual Machines” and then select the VM.
Click on Connect.
It will take time to connect, so wait patiently.
Creating Azure Sentinal Workspace
This is the actual SIEM workspace where we will plot the map locating the geolocation of the users.
Head on to the search bar and search for “sentinal”.
Select Microsoft Sentinal.
Click on “Create”.
Select the Workspace showing there and click on “Add”.
Connecting to VM via RDP
Next, we will configure our VM to get the failed RDP logs.
Head on to Virtual Machine → Overview.
It will show the properties of VM.
Copy the “Public IP” of the VM.On your host VM, search fot RDP.
This functionality is only available in Windows 10/11 Pro or Enterprise.
Paste the IP (which copied from the VM properties) and click Connect.
It will prompt for the credentials. Fill them (which we created during the VM creation)
It may prompt for accepting the risk, select “Yes”.
It will start the RDP session.
Set up the necessary settings (like Browser).
Let us see, the event logs which were generated while we tried to log in to the VM with wrong credentials.
Navigate to “Event Viewer” (Directly search in the search box).
Head on to the Windows Logs — > Security.
Search for Event Id = “4625".
It will show the details of the users who failed during logging to the VM.
In details, we can see the IP address of the user, but can’t see the country or any other details.
We will now turn off the firewall of the VM, so that hackers can easily discover our VM and try to attack.
Search for “wf.msc” in search box (in VM).
Click on “Windows Defender Firewall Properties”.
Turn the firewall state “OFF” for every profile (Domain, Private & Public Profile) and click “Apply”.
We did this for the lab purpose, never try this on your own host, otherwise your system can be compromised.
Exporting the failed RPD logs
We will use 3rd party API to fetch the location information.
Search for “powershell ise” in the search box.
Click on File → New
Head on to this link**.
C**opy the codes and paste in the ISE workspace.
I am not going in the working of the code.
Just understand that it extracts logs from Windows Event Viewer where Event ID = 4625 i.e. failed RDP logs and creates its own custom logs with the geolocation in it (which it fetches from the API).
We need to generate our own API key.
Sign up in the website ipgeolocation.io to generate API keys.
Use tempmail to signup up.
Once the key is generated, replace the string after “$API_KEY = ”
Run the query .
It shows all the failed RDP logs.
Leave the script running.
Importing Logs into Log Analytics Workspace
Once we have generated our own custom logs, we will now import them into our Log Analytics Workspace (which we created earlier) and analyse it.
Head on to Log Analytics Workspace and select our workspace.
Select Tables → Create → New Custom Log (MMA-based).
One needs to upload the sample logs.
The script stores the logs in “C:\ProgramData\failed_rdp.log” (which is by default hidden). So, to unhide it:
In VM, open “C drive”.
Click on 3 dots and select Options.
In View tab, select Show hidden files, folders, drives.
Click OK.
Its visible now:
Open the file and copy all the data inside it.
Go to the host system and create a new text file with name rdp_failed.log and paste all the data into it.
Save it.
Upload that file into sample log area and click Next.
It will import all the logs into the workspace.
Click Next.
In Collection paths, select Windows and provide the path, where the extracted logs are stored.
In our case, it is “C:\ProgramData\failed_rdp.log”.
Click Next.
Give the name to our custom log.
It automatically appends “_CL” at the end of the custom log file name.
(So, it becomes FAILED_RDP_WITH_GEO_CL)Click Next.
Extracting Logs
Head on to Log Analytics Workspace and select the workspace.
Select Logs, and then paste this query:
FAILED_RDP_WITH_GEO_CL | extend username = extract(@”username:([^,]+)”, 1, RawData), timestamp = extract(@”timestamp:([^,]+)”, 1, RawData), latitude = extract(@”latitude:([^,]+)”, 1, RawData), longitude = extract(@”longitude:([^,]+)”, 1, RawData), sourcehost = extract(@”sourcehost:([^,]+)”, 1, RawData), state = extract(@”state:([^,]+)”, 1, RawData), label = extract(@”label:([^,]+)”, 1, RawData), destination = extract(@”destinationhost:([^,]+)”, 1, RawData), country = extract(@”country:([^,]+)”, 1, RawData) | where destination != “samplehost” | where sourcehost != “” | summarize event_count=count() by timestamp, label, country, state, sourcehost, username, destination, longitude, latitude
The above query extracts the data from the custom logs we uploaded and format them as per seperate tags.
Click on run.
It may take 5–10 minutes to sync. (Have patience 😗)
Once synced, it will start showing the parsed data.
Creating Sentinal Workbook
Head on to Microoft Sentinal → Workbooks.
Click on “Add workbook”.
By default, it has few templates. Delete them.
Click on Add → Add query.
Paste the same query (which we pasted in Log Analytics Workspace):
FAILED_RDP_WITH_GEO_CL | extend username = extract(@”username:([^,]+)”, 1, RawData), timestamp = extract(@”timestamp:([^,]+)”, 1, RawData), latitude = extract(@”latitude:([^,]+)”, 1, RawData), longitude = extract(@”longitude:([^,]+)”, 1, RawData), sourcehost = extract(@”sourcehost:([^,]+)”, 1, RawData), state = extract(@”state:([^,]+)”, 1, RawData), label = extract(@”label:([^,]+)”, 1, RawData), destination = extract(@”destinationhost:([^,]+)”, 1, RawData), country = extract(@”country:([^,]+)”, 1, RawData) | where destination != “samplehost” | where sourcehost != “” | summarize event_count=count() by timestamp, label, country, state, sourcehost, username, destination, longitude, latitude
Click on “**Run Query”.
**It will parse data from the custom logs.To convert the parsed data into Map form, from the drop down menu (in same line of Run Query) , select Visualisation → Map.
Configure the metric labels as shown below:
Once configured, click on Apply → Save and Close*.*
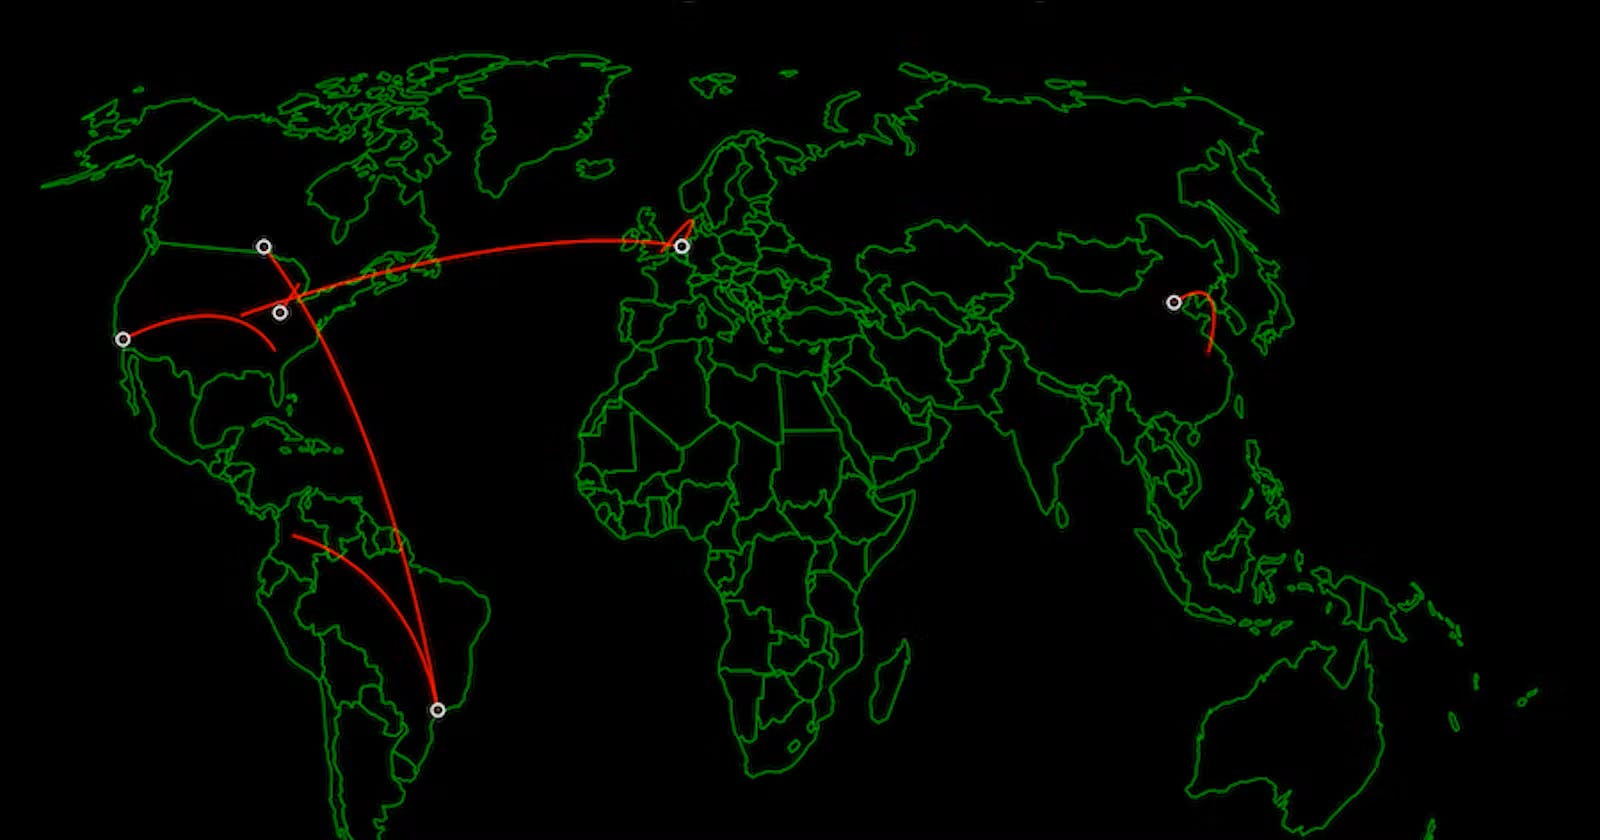
It will start showing the information in the world map.
Save the query in the same resource group (which we created earlier).
Click “Done Editing”.
It will show the full screen map locating the location of the user which failed in logging into the VM.
One can select “Auto refresh: 5 minutes”. (Optional)
Leave the script in the VM running atleast for a day, so that it can be parsed into the map.
The data showing above is the update after 7–8 hours.
Clearly, different people accross the world started discovering our VM and tried to get the RDP session.
Takeaways
If you are online, someone will always try to get into your system irrespective of what information/data you have.
From the above image, it is clear that most common usernames (like Admin, Administrator, test, user, personal, etc…) are commonly targeted.
So, make sure not to use those common usernames in your devices.Use MFA wherever & whenever possible and enable firewall.
Deny open inbound connections from common ports like RDP, instead use restricted access with some kind of authorization.
Disable bruteforcing options.
Use the “Defense in depth” to ensure maximum prevention from the common cyber attacks.
There are lot of scope of improvements in this, but as of now, this was it for this project.
Once you are done with the project, make sure to delete the Resorce Group (HoneypotLab), so that no extra bills will be generated.
Hope you got to learn something new from this and would have added value to your learnings.
All thanks to Josh Madakor for this project idea and his video on YouTube, which is the base of this project.
Follow for more such learnings on cloud and cyber security and technology.
Hope to meet soon in the next article. Till then, keep learning, keep exploring and most importantly, be happy… 🤗😇